
Working With Preference Sets
Creating New Preference Sets
To use the Archive's User Preferences feature, you must create a user account.
Once your account is created, you may log into the Exoplanet Archive on any computer to access your preference sets. Your preference sets are not affected if your browser cookies are deleted.
To create a new preference set:
- Log into your account and go to an interactive table, such as the Confirmed Planets table.
- Filter and sort the data and rearrange, add, or remove columns in the table as needed.
- For instructions on sorting and filtering data, see the Sorting and Filtering Data section of the Interactive Table User Guide.
- For instructions on changing column location, see the Re-arranging Columns section of the Interactive Table User Guide.
- To add or remove columns, click Select Columns to display the Column Controls pop-up. For more information, see the Showing and Hiding Columns section of the Interactive Table User Guide.
- You may also click the red
 icon in the upper-right corner of a column to remove it.
 - Click on User Preferences in the table menu bar and select Save/Manage.
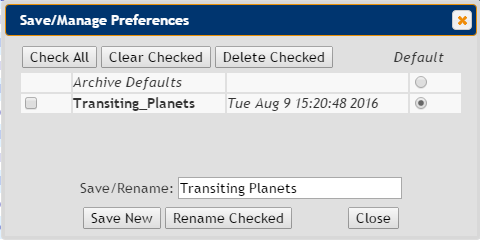
- In the Save/Manage Preferences pop-up menu, enter a name for your preference set in the Save/Rename: field. In the following example, we're creating a preference set called Transiting Planets.
- Click Save New.
- Click Close.


Notice the new set now appears in the list of preference sets, along with the time and date it was created. Also, in our example, the new set has automatically become the default view for future visits to this interactive table. This only happens the first time you create a new preference set; subsequent preference sets do not automatically become the default set (you can designate them manually; see Setting a New Default Preference Set).
Loading a Saved Preference Set
Your default preference set is the one marked Default in the Save/Manage Preferences menu. However, you may create multiple preference sets for a table to perform different types of data analysis. In this example, we toggle from the default view to another set focused on microlensing planets.
- Click on User Preferences in the interactive table's menu bar and select Load from.
- Click on the desired preference set from the Load Named Preference list. In the following example, we are selecting the Microlensing_With_Time_Series set.


The table will automatically reload with the new preference set applied. Notice the name of the currently applied preference displays in red on the table tab.

If you have multiple browser tabs open displaying the same interactive table, the preference set you loaded, regardless of tab, will display upon page reload/refresh.
Updating an Existing Preference Set
Follow these steps if you choose to refine existing preference sets rather than create new ones.
- Load the preference set you want to modify.
- Make your modifications to the table's sorting, filtering, column selection, and column location.
- Click on User Preferences in the table menu bar and select Save/Manage.
- Check the box for the preference set you are updating.
- Clear any text in the Save/Rename field.
- Click Save New.
- Click Close.
Renaming a Preference Set
- Click on User Preferences in the table menu bar and select Save/Manage.
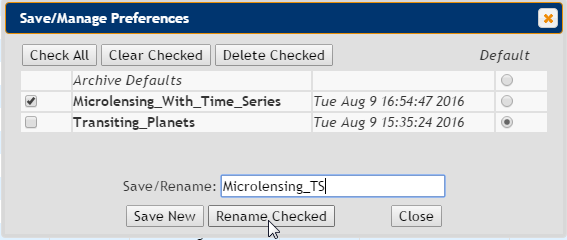
- Check the box for the preference set you are renaming.
- Enter the new name in the Save/Rename: text field. In the following example, we are renaming Microlensing_With_Time_Series to Microlensing_TS.
- Click Rename Checked.
- Click Close.

Deleting Preference Sets
- Click on User Preferences in the table menu bar and select Save/Manage.
- Check the box(es) for the preference set(s) you are deleting. In the following example, we are deleting the Favorite_Planets set.
- Click Delete Checked.
- Click Close.

Note: If you delete your designated default set, the system reverts to Archive Defaults.
Setting a New Default Preference Set
A default preference set is your preselected view of the interactive table when it is initially loaded. If you do not set your own default, the table will display the Archive Defaults (see next section).
- Click on User Preferences in the table menu bar and select Save/Manage.
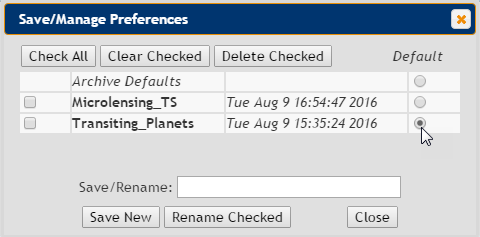
- Find the new default preference set in the list and click the radio button to the right. In the following example, the default view is being changed from Microlensing_TS to Transiting_Planets.
- Click Close.
- Reload/refresh the web page. Notice the new default preference set name displays in the table name tab.
Note: Changing the default set takes effect when you click the radio button; to back out of a change, simply select a different set.
Restoring Archive Defaults
Archive Default is the "factory reset" view of the interactive table: this is the view for all users when no customization is applied or saved.
If you want to load Archive Defaults only for the current session:
- Click on User Preferences in the table menu bar and select Restore Archive Defaults.
The table will automatically refresh.
If you want to load Archive Defaults for all future sessions:
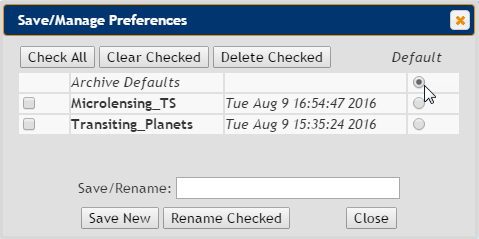
- Click on User Preferences in the table menu bar and select Save/Manage.
- Click the radio button for the Archive Defaults entry.
- Click Close.
- Reload/refresh the web page to view the updated default preference set. Notice there is now no preference set name displayed in the table name tab.
Go to: Account Management
Last updated: 26 August 2016